
When creating your artwork for heat transfers there are many variables that can affect the quality of your final product. One variable is line weight, or the thickness, of your printed lines and non-printing areas. Anything outside of our recommended specifications can result in certain areas of your art “filling in” in with unwanted ink or even some details to not print. Following this guide will ensure you are giving us the best artwork you can.
Recommended Line Weights for Heat Transfers
- Spot Color – 1pt
- Unlimited Color – 3pt
- Non-Printing Areas – 2pt
Check It
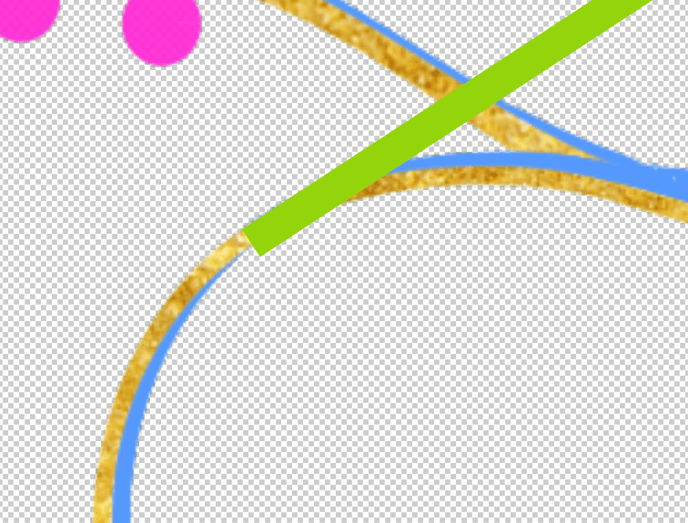
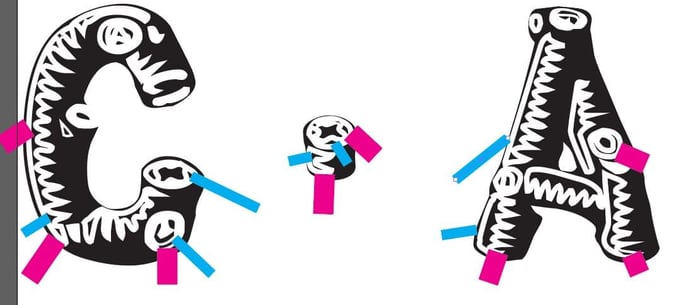
With your artwork open, draw a line near the areas you would like to check and assign it a contrasting color. Adjust the line weight as you go about your artwork, checking your lines and non-printing areas to see if they fall within specifications. Don’t forget to remove them afterwards!
Fix It
With vector artwork, you may be able to add a stroke to your art to increase the line weight and satisfy our print specifications. Some areas of your artwork may require you to redraw them completely. After making these adjustments be sure to check again as this may affect your non-printing areas.
Order It
When submitting your artwork, you will have two options under Artwork Review, “Standard” and “Print As Is”.
When selecting “Standard”, we will do the same checks I have just outlined for you in this guide. We will mark anything outside of our specifications and send you a screenshot with a request on how to proceed. You can fix it yourself, have us fix it for a fee, or change your option to “Print As Is”.
When selecting “Print As Is”, we will print your artwork regardless of quality. This is recommended for artwork that has a vintage look or some left chest or smaller designs that cannot be adjusted. This is not recommended for text or other necessary design elements.