
A heat transfer that presses perfectly on one garment might lift or crack on another. When that happens, our support team works through the same checks to find the cause. This guide walks you through those checks, so you can run them yourself when an issue comes up or, better yet, before you press the full order.

The first check is your heat press settings: temperature, time, pressure, and peel method. When all four are right for your formula and fabric, the transfer fully releases onto the garment and lasts without cracking or peeling after multiple washes.
- Temperature: how hot the platen gets. It changes by formula and fabric, from 275°F to 375°F.
- Time: how long the press stays closed on the transfer.
- Pressure: how hard the press clamps down. Maximum pressure means 8 to 9 on a manual press, or 60 PSI on an automatic press.
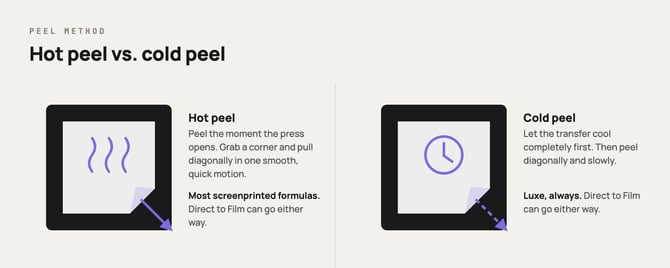
- Peel method: how and when you remove the carrier sheet. A hot peel means you peel right after the press opens. A cold peel means you let the transfer cool completely first.
All four work together. If one is off, the transfer can lift, peel, or not stick at all.
Settings by formula:
- Most screenprinted formulas: 7 seconds, maximum pressure, and a hot peel. The temperature depends on your formula and fabric.
- Direct to Film: 300 to 320°F depending on the fabric, 7 to 10 seconds, medium to heavy pressure, and a hot or cold peel.
- Luxe: 285 to 300°F depending on the fabric, 10 seconds, medium to heavy pressure, and a cold peel only.
- Silicone: 285°F for 10 to 12 seconds, medium to maximum pressure, and a hot peel.
Check the tables below for the exact temperature by formula and fabric.
Screenprinted formulas
All of these press for 7 seconds at maximum pressure with a hot peel, except Silicone. Its settings are in the time, pressure, and peel method table below.
| Formula | Temperature | Fabric |
|---|---|---|
| Classic | 350°F | 100% cotton, cotton/poly blends, and denim/canvas |
| Varsity | 325°F | 100% cotton, cotton/poly blends, tri-blends, and denim/canvas |
| Varsity | 300°F | 100% polyester, spandex or Lycra (with caution), and neoprene |
| Vintage | 375°F | 100% cotton and cotton/poly blends (with caution) |
| Original and Original + Blocker | 325°F | Tri-blends |
| Original and Original + Blocker | 320°F | 100% cotton, cotton/poly blends, and denim/canvas |
| Original and Original + Blocker | 315°F | Spandex or Lycra |
| Original and Original + Blocker | 300°F | 100% polyester and neoprene |
| Original and Original + Blocker | 275°F | Non woven/polypropylene |
| Puff | 350°F | 100% cotton, cotton/poly blends, and denim/canvas |
| Puff | 300°F | Neoprene (with caution) |
| Stretch | 325°F | 100% cotton, cotton/poly blends, 100% polyester, tri-blends, spandex or Lycra, and denim/canvas |
| Glow in the Dark and Neon | 325°F | 100% cotton, cotton/poly blends, tri-blends, and denim/canvas |
| Glow in the Dark and Neon | 300°F | 100% polyester, spandex or Lycra (with caution), and neoprene |
| Nylon | 300°F | Nylon |
| Non Woven | 275°F | Non woven/polypropylene |
| Silicone | 285°F | 100% polyester |
Direct to Film and Luxe
| Formula | Temperature | Fabric |
|---|---|---|
| Direct to Film | 320°F | 100% cotton and denim/canvas |
| Direct to Film | 310°F | Cotton/poly blends |
| Direct to Film | 300°F | 100% polyester, tri-blends, spandex or Lycra (with caution), non woven/polypropylene (with caution), and neoprene |
| Luxe | 300°F | 100% cotton, cotton/poly blends, tri-blends, spandex or Lycra (with caution), neoprene, and denim/canvas |
| Luxe | 290°F | 100% polyester |
| Luxe | 285°F | Non woven/polypropylene |
With caution means the formula can work on that fabric, but test a transfer on it before you run the full order. If your fabric isn't listed for your formula, that formula isn't recommended for it.
These temperatures come from our temperature guide, which you can also download as a PDF.
Time, pressure, and peel method
| Formula | Time | Pressure | Peel method |
|---|---|---|---|
| Screenprinted formulas (except Silicone) | 7 sec | Maximum | Hot |
| Silicone | 10 to 12 sec | Medium to maximum (40 to 60 PSI) | Hot |
| Direct to Film | 7 to 10 sec | Medium to heavy | Hot or cold |
| Luxe | 10 sec | Medium to heavy | Cold only |
Pressing UV DTF stickers? They don't need a heat press. You apply them by hand to hard surfaces.
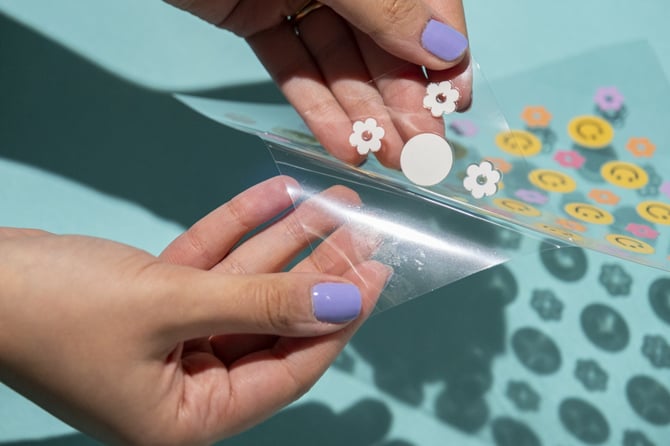
For step-by-step instructions, see the application guide for your formula: screenprinted transfers, Varsity, Classic, Vintage, Puff, Direct to Film, and Luxe.
How to press a transfer so it sticks
- Set your press to the temperature, time, and pressure for your formula and fabric.
- Take off any Teflon sheet, cover, or pillow from the platen. Nothing should sit between the heat and the transfer on the first press.
- Pre-press the garment for about 3 seconds. This takes out wrinkles and moisture, and both can keep the adhesive from bonding.
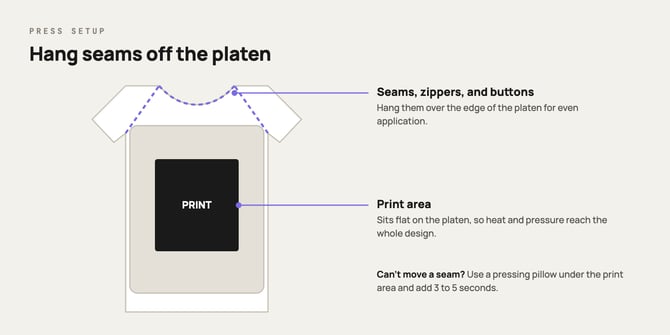
- Keep seams, zippers, and buttons off the platen. Hang them over the edge so the press sits flat on the print area.
- Place the transfer print-side down, so the ink touches the garment, and press for the full time.
- Use the peel method your formula calls for. For a hot peel, hold the garment steady the moment the press opens, grab a corner, and peel diagonally in one smooth, quick motion. For a cold peel, let the transfer cool completely, then peel diagonally and slowly.
- Post-press Direct to Film. Cover the transfer with Teflon paper for a gloss finish or parchment paper for a matte finish, then press again for 5 to 10 seconds. This helps seal the transfer to the garment.
- Let the garment rest for 24 to 48 hours before you fold or wash it. The adhesive keeps curing during that time.
Tip: Before you run the full order, press one transfer on the same garment you plan to use. If it sticks and peels the way it should, your settings are right for that garment.
If your transfer isn't sticking or lifts at the edges
Not enough pressure. Pressure is easy to miss, because many presses don't display it the way they display temperature and time. Set your press to maximum pressure for screenprinted transfers, and to medium to heavy for Direct to Film and Luxe. Your press manual shows how to adjust it.
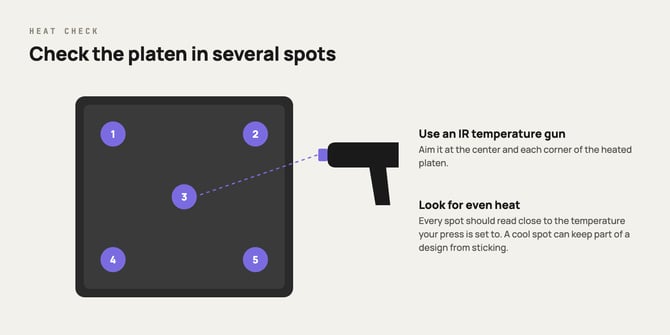
A press that isn't as hot as it reads. The number on your press isn't always the heat reaching the transfer. Check the platen with an infrared (IR) temperature gun to make sure it's heating accurately and evenly.
A Teflon sheet on the first press. A Teflon sheet or cover between the platen and the transfer can drop the heat reaching the transfer by up to 30°F, which is enough to keep the adhesive from bonding. Use Teflon for post-pressing only. Applying with a Teflon sheet also voids the replacement warranty. More on this in can I use Teflon sheets with your transfers.
The wrong peel method. Luxe is cold peel only, so let it cool completely before you peel. Screenprinted transfers are made to peel hot, right when the press opens. Direct to Film works either way.
Settings for a different formula. Formulas don't all apply the same way. Check the packing label, which lists the product type and its application instructions, and make sure your settings match that formula and your fabric.
Seams, zippers, or thick areas under the print. If you can't move a seam off the platen, use a pressing pillow under the print area to even out the pressure, and add 3 to 5 seconds to the press time.
Large prints or textured fabric. Designs that cover a big area may need more heat and pressure. For Direct to Film on textured fabric, press for up to 15 seconds and rub the transfer before you peel.
Coated or water-repellent fabric. Some performance and water-repellent coatings keep the adhesive from bonding. Test first. On nylon garments, use the Nylon formula, which is made for that fabric.
A hand iron, a craft press, or a press we don't recommend. Screenprinted transfers need the firm, even pressure of a commercial heat press, so we don't recommend hand irons or craft presses for them. Luxe is the exception: the Luxe application instructions show how to apply it with a hand iron or craft press. If you're using a commercial press that isn't one of the presses we recommend, raise the temperature by 10°F, pre-press the garment for 7 to 10 seconds, and use the most pressure your press allows.
Vintage needs more heat than any other formula, so it takes a little tweaking. If your press is set to 375°F and the transfer still won't stick, check the real temperature with an IR temperature gun or heat strips. Your press may not be reaching 375°F.
If part of the design stays on the paper
If some of the ink stays on the paper when you peel, check these:
- Peel at the right moment. Hot peel formulas are made to be peeled the moment the press opens. Hold the garment steady, grab a corner, and peel diagonally in one smooth, quick motion.
- Check the real temperature and pressure. Use an IR temperature gun to confirm the heat, and make sure the pressure matches your formula.
- Pre-press the garment. Moisture in the fabric can keep the ink from bonding to it.
- Peel Luxe cold only. Luxe must cool completely before you peel.
Direct to Film can be peeled hot or cold. If small letters or edges lift when you peel hot, press the next one, let it cool completely, then peel diagonally in a smooth motion.

If only one color, letter, or spot won't stick
When most of the design presses cleanly but one area doesn't, check what's happening in that spot:
- Uneven heat. Check the platen in several places with an IR temperature gun. Heat should be even across the whole print area.
- A seam, zipper, or thick area under that part of the print. Move it off the platen, or use a pressing pillow and add 3 to 5 seconds to the press time.
- Uneven pressure. The press should sit flat on the whole design. Check your press manual for how to set and level the pressure.
If it keeps happening in the same spot, stop pressing and contact support with a photo.
If your transfer peels or cracks after washing
If a transfer lifts in the wash, check all four settings against your formula, then give the next garment the full 24 to 48 hours to cure before you wash it.
After that, care decides how long the print lasts:
- Wash the garment inside out, in cold water.
- Line dry for best results. A low or delicate tumble dry is okay, but repeated dryer heat can break down the print over time.
- Skip fabric softener and bleach, and don't iron over the print.
Full care steps are in wash and care instructions.
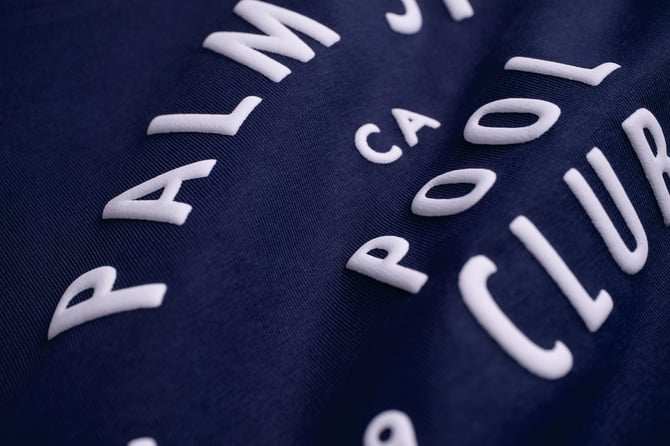
Because Puff is raised, it's more prone to cracking than flat prints. Press it at 350°F with maximum pressure, wash it inside out in cold water, and line dry it. Never put Puff garments in the dryer. The heat reactivates the puff and can crack the print.
If you're pressing hats, bags, or other items
- Caps: use 5-panel caps when you can, because they usually don't have a center seam. Some 6-panel caps work, depending on your artwork and how much ink it covers. More on this in will our transfers work on baseball caps.
- Bags and non woven items: find the fabric in the temperature tables above. Non Woven presses at 275°F on polypropylene and non woven fabrics.
- Hard goods and textured items: Direct to Film works on many items beyond apparel, as long as the item can handle the application temperature and you can press it with even heat and pressure. More on this in what Direct to Film can be applied to.
Always test on any new fabric or item before you run the full order.
If the fabric scorches or melts
Lower the temperature to the bottom of your formula's range, and test again. For bags and fabrics that scorch or melt easily, like polypropylene, choose a low-temperature formula such as Non Woven at 275°F.
How to store transfers you'll use later
Keep unused transfers in their cellophane wrapping, stored flat in a cool, dry place between 32°F and 75°F, away from sunlight and heat. Stack them no more than 100 to 200 high, because too much weight can damage the bottom transfers. We recommend using transfers within 3 years of production. Vintage has a shorter shelf life than Varsity and Original. More on this in the best way to store your heat transfers.
Still stuck?
Before you reach out:
- Stop pressing the rest of the order until you know what's causing the issue.
- Check the packing label to confirm the formula and its application settings.
- Take a photo or video of what you're seeing.
Then email support@613originals.com with your order number in the subject line. You can also call (201) 316-1919, Monday to Friday, 8 AM to 6 PM ET.