
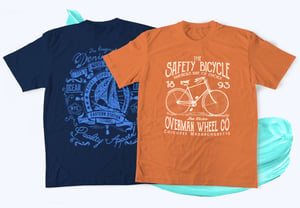
Learn how to apply screen printed heat transfers, including how to check your temperature and pressure, for all our formula types!
Applying our screen printed heat transfers is quick and easy. All you need is a commercial heat press, 613 Originals transfers, and a product to apply them on! All of our transfers apply in 7 seconds and maximum pressure, but may have different temperatures. Follow the steps and instructions below to achieve perfect results on your next application!
Looking for DTF Application Instructions? Click here.
Getting Ready in 3, 2, 1..
3. First, Check Your Temperature & Pressure
It's important to calibrate your press to the proper temperature and pressure required for quality results. For checking temperature, we recommend using a quality Infrared (IR) Temperature Gun (Contactless) to ensure your heat press is heating evenly and accurately. Extra credit for doing this every time you start a new project.
When it comes to quality heat pressed garments, pressure is (almost) everything. Not using enough pressure is the most common cause for any application issues we see. Make sure your pressure is set correctly on your machine - refer to your press' manual for how to do this correctly.
2. Remove Teflon Sheets, Covers or Pillows - You Don't Need Them!
We don't recommend using teflon sheets, covers, or pillows with any of our screen printed heat transfers, as they can compromise the amount of heat getting to the transfer. Less heat means application issues - totally uncool.
1. Test Before Your Press
We recommend testing a sample transfer on the intended fabric before full production, especially when using a newer transfer formula or fabric. This quick sample will ensure you're ready to go. Just be sure to check the fabric contents before ordering and applying our transfers. Be mindful of any coatings, like waterproofing, that may have been added to the item (for example, a waterproof windbreaker may not be just Polyester).
And if something doesn't work out as expected, you'll have a chance to troubleshoot - saving you time and money. We love that!
Application Instructions
Step 1: Adjust Settings
Set your time and temperature to our recommended settings (see below) for your fabric type.
Step 2: Load Garment and Place Transfer
Lay garment down on the lower platen, making sure seams, zippers, etc are off the edge. This ensures even application. Place the transfer print-side down so that the ink is touching the garment - make sure it's not upside down!
Step 3: Press, Peel, Profit!
Close your press and press the transfer for 7 seconds. Peel the backing paper immediately after opening the press. Holding the garment steady, grab a corner of the paper and peel diagonally in a smooth, deliberate motion.
Application Settings
Now that you've calibrated your press and read up on how to apply a transfers, you're ready for the best part - the actual pressing! Find your formula below to get our recommended application settings.
Original Formula Application Settings
 Temperature:
300ºF / 163˚ C for 100% Polyester
320˚F / 160˚ for Cotton/Poly Blends
Time:
7 Seconds
Pressure:
Max (8-9 Manual, 60PSI Automatic)
Peel: Hot
Recommended for:
100% Polyester, 100% Cotton, Cotton/Poly Blends, Neoprene
Varsity Formula Application Settings
 Temperature:
325˚ F / 163˚ C
Time:
7 Seconds
Pressure:
Max (8-9 Manual, 60PSI Automatic)
Peel: Hot
Recommended for:
100% Polyester, 100% Cotton, Cotton/Poly Blends, Neoprene
Classic Formula Application Settings
 Temperature:
350-375˚ F / 177-183˚ C
Time:
7 Seconds
Pressure:
Max (8-9 Manual, 60PSI Automatic)
Peel: Hot
Recommended for:
100% Cotton, Cotton/Poly Blends
Vintage Formula Application Settings
 Temperature:
375˚ F / 183˚ C
Time:
7 Seconds
Pressure:
Max (8-9 Manual, 60PSI Automatic)
Peel: Hot
Recommended for:
100% Cotton, Cotton/Poly Blends
Stretch Formula Application Settings
 Temperature:
325˚ F / 149˚ C
Time:
7 Seconds
Pressure:
Max (8-9 Manual, 60PSI Automatic)
Peel: Hot
Recommended for:
100% Cotton, Cotton/Poly Blends with Spandex or Lycra
Polypropylene (NonWoven) Formula Application Settings
 Temperature:
270˚ F / 132˚ C
Time:
7 Seconds
Pressure:
Max (8-9 Manual, 60PSI Automatic)
Peel: Hot
Recommended for:
Polypropylene, Non-Woven fabrics, PET, paper bags
 Temperature:
350˚ F / 177˚ C
Time:
7 Seconds
Pressure:
Max (8-9 Manual, 60PSI Automatic)
Peel: Hot
Recommended for:
100% Cotton, Cotton/Poly Blends
Puff Pro Tip: For best results, pre-press your garment for 3 seconds to remove all moisture before applying our puff transfers.
 Temperature:
365˚ F / 185˚ C
Time:
12 Seconds
Pressure:
Max (8-9 Manual, 60PSI Automatic)
Peel: Cold
Recommended for:
100% Cotton, Cotton/Poly Blends
Glitter Pro Tip: To save some time when decorating multiple garments, press and stack - allowing all transfers to cool - before circling back to peel.
Nylon Formula Application Settings
 Temperature:
300˚ F / 149˚ C
Time:
7 Seconds
Pressure:
Max (8-9 Manual, 60PSI Automatic)
Peel: Hot
Recommended for:
100% Nylon
Neon Formula Application Settings
 Temperature:
325˚ F / 163˚ C
Time:
7 Seconds
Pressure:
Max (8-9 Manual, 60PSI Automatic)
Peel: Hot
Recommended for:
100% Polyester, 100% Cotton, Cotton/Poly Blends, Neoprene
Glow in the Dark Formula Application Settings

Temperature:
325˚ F / 163˚ C
Time:
7 Seconds
Pressure:
Max (8-9 Manual, 60PSI Automatic)
Peel: Hot
Recommended for:
100% Polyester, 100% Cotton, Cotton/Poly Blends, Neoprene
Extra Tips & Tricks
Preparing Your Item
- We recommend pre-pressing your garment to remove any wrinkles and/or excess moisture from the fabric.
- Make sure any zippers, seams, buttons, etc are off of the edge of the platen for even application.
Use a Commercial Heat Press
Not sure which one to get? Click here to read more about the presses we love and recommend.
If you own a heat press which is not one of our recommended brands, you can try these steps:
- Increase your temperature +10°
- Preheat your garment for 7 - 10 seconds
- Use the Maximum pressure your machine will allow
Cricut® Easy Press and other low-end Amazon presses aren't built to provide the required pressure needed to apply our transfers correctly. We strongly do not recommend using these types of presses.
Still having trouble applying our transfers? Contact our team here.
Wash & Care Instructions
For long lasting transfers, we recommend washing inside out with cold water. Line dry is strongly recommended, but who really has time for that? Tumble dry with low heat works great too.
We recommend laying the newly applied garments out for about 24 - 48 hours to allow the garment to completely cure before folding or washing.
Click here for more information about washing your heat pressed garments.
Disclaimer
We can not guarantee heat transfer washability as we're unable to verify our product was applied and washed properly according to our recommended guidelines. Our products are purchased from many major retailers who do their own testing before accepting our products. Many of these clients require a minimum washability test of 60 washes.